



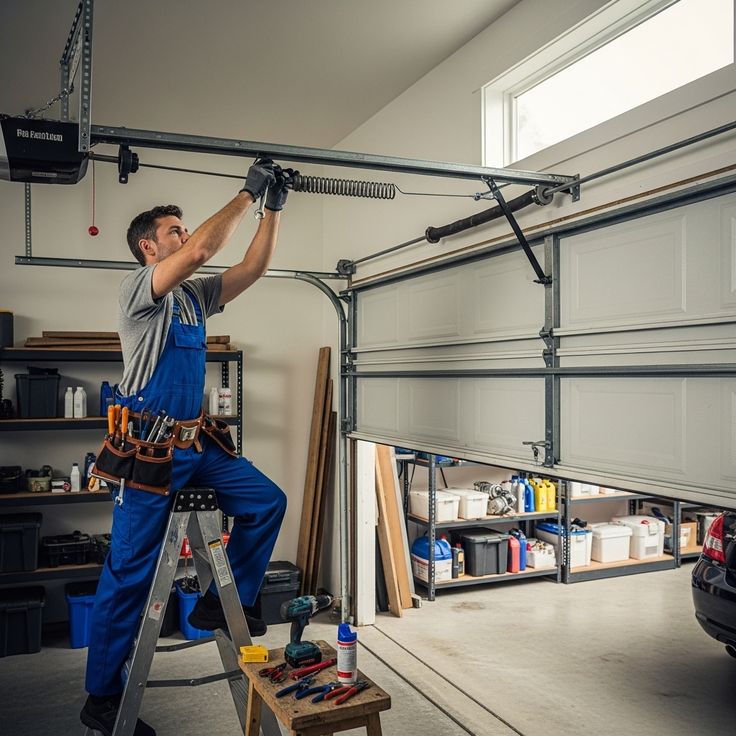
A garage door opener adds convenience, security, and functionality to your home. With the push of a button, you can open and close your garage door without leaving your vehicle, while modern openers also offer features such as smartphone control, battery backup, and enhanced safety systems.
Installing a garage door opener is a project that many homeowners can tackle with the right tools, preparation, and attention to detail. This step-by-step guide will walk you through the garage door installation Phoenix AZ process and help ensure your garage door opener operates safely and efficiently.
Benefits of Installing a Garage Door Opener
Before beginning the installation, it’s worth understanding why a garage door opener is a valuable upgrade.
Convenience
Open and close your garage door remotely without manually lifting the door.
Enhanced Security
Modern openers feature rolling code technology, which changes access codes after each use to prevent unauthorized entry.
Improved Safety
Automatic reversal systems and photo-eye sensors help prevent accidents and injuries.
Smart Home Integration
Many newer models can connect to smartphones, voice assistants, and home automation systems.
Tools and Materials You’ll Need
Gather all tools and equipment before starting the installation.
Essential Tools
- Power drill
- Socket wrench set
- Screwdrivers
- Adjustable wrench
- Tape measure
- Step ladder
- Level
- Pliers
- Hammer
Safety Equipment
- Safety glasses
- Work gloves
Materials
- Garage door opener kit
- Mounting brackets
- Fasteners
- Safety sensors
- Wall control panel
- Remote controls
Always verify that all components included in the opener kit are present before beginning.
Step 1: Read the Manufacturer’s Instructions
Garage door opener models vary by brand and design.
Before assembling anything:
- Review the installation manual thoroughly
- Identify all included parts
- Familiarize yourself with safety warnings
- Understand wiring requirements
Following the manufacturer’s instructions will help avoid mistakes during installation.
Step 2: Check the Garage Door Condition
A garage door opener should only be installed on a properly functioning door.
Inspect the Door
Check for:
- Damaged panels
- Worn rollers
- Bent tracks
- Loose hardware
- Frayed cables
Test Door Balance
Disconnect any existing opener and manually lift the door halfway.
A properly balanced door should stay in place without rising or falling.
If the door is difficult to operate manually, address those issues before installing the opener.
Step 3: Assemble the Opener Rail
Most garage door openers include a multi-piece rail system.
Assembly Process
- Lay all rail sections on the floor.
- Connect the sections according to the manual.
- Attach the trolley to the rail.
- Install the chain, belt, or screw-drive mechanism.
Ensure all connections are secure and properly aligned.
Step 4: Attach the Rail to the Motor Unit
The rail assembly connects directly to the opener motor.
Steps
- Position the rail near the motor unit.
- Secure it using the provided hardware.
- Tighten all fasteners according to specifications.
Double-check alignment before proceeding.
Step 5: Install the Header Bracket
The header bracket anchors the opener system above the garage door.
How to Install
- Locate the center point of the garage door opening.
- Mark the position above the door.
- Attach the bracket securely to structural framing.
The bracket must be mounted into solid framing, not drywall or trim.
Step 6: Raise and Position the Opener
This step often requires assistance.
Procedure
- Place the motor unit on a ladder.
- Lift the rail assembly into position.
- Connect the rail to the header bracket.
Use temporary supports if needed while securing the system.
Step 7: Mount the Motor Unit
The motor unit should be suspended from the garage ceiling.
Installation Steps
- Locate ceiling joists or structural supports.
- Attach mounting brackets.
- Suspend the motor unit securely.
- Verify that the unit is level.
Proper support is critical because the opener experiences vibration during operation.
Step 8: Install the Door Bracket
The door bracket connects the garage door to the opener arm.
Steps
- Locate the center of the top door panel.
- Install the bracket according to the manufacturer’s specifications.
- Secure it firmly using the recommended fasteners.
Reinforcement brackets may be required for lightweight doors.
Step 9: Connect the Opener Arm
The opener arm links the trolley to the garage door.
Procedure
- Attach one end to the trolley.
- Connect the other end to the door bracket.
- Adjust arm length as instructed.
- Tighten all hardware securely.
Ensure the arm moves freely throughout the door’s travel path.
Step 10: Install Safety Sensors
Safety sensors are one of the most important components of any garage door opener system.
Placement Requirements
- Install sensors on both sides of the door.
- Position them approximately six inches above the floor.
- Align them directly across from each other.
Wiring
Run sensor wires back to the motor unit and secure them neatly along walls and ceilings.
Misaligned sensors can prevent the door from closing properly.
Step 11: Install the Wall Control Panel
The wall control allows convenient operation from inside the garage.
Installation Steps
- Choose an accessible location near the entry door.
- Mount the control panel.
- Run wiring to the motor unit.
- Connect wires according to the manufacturer’s instructions.
Keep wall controls out of reach of small children.
Step 12: Connect Power
Once all mechanical and wiring work is complete:
Power-Up Process
- Plug the opener into a grounded outlet.
- Restore electrical power if disconnected.
- Verify that indicator lights illuminate properly.
Avoid using extension cords for permanent installations.
Step 13: Program the Remote Controls
Most opener systems include one or more remote transmitters.
Programming Steps
- Press the opener’s learn button.
- Activate the remote control.
- Confirm successful pairing.
Repeat for additional remotes if necessary.
Many modern systems also allow smartphone app setup.
Step 14: Adjust Travel Limits
Travel limits determine how far the door opens and closes.
Adjustments Include
- Open position
- Closed position
- Force settings
Follow the manufacturer’s guidelines carefully.
Improper settings can damage the door or opener.
Step 15: Test the Garage Door Opener
Before regular use, perform several complete operating cycles.
Check For
- Smooth operation
- Proper alignment
- Unusual noises
- Consistent movement
The door should open and close evenly without hesitation.
Step 16: Test Safety Features
Safety testing is a critical final step.
Test the Auto-Reverse System
Place a solid object on the floor beneath the door.
When the door contacts the object, it should reverse immediately.
Test the Photo-Eye Sensors
Interrupt the sensor beam while the door is closing.
The door should stop and reverse.
If either test fails, adjust the system before using the opener.
Common Installation Mistakes to Avoid
Improper Header Bracket Mounting
The bracket must be secured to structural framing.
Poor Sensor Alignment
Misaligned sensors are a common cause of operational issues.
Incorrect Travel Limit Settings
Improper adjustments can strain the opener and damage the door.
Installing on an Unbalanced Door
A garage door opener is not designed to compensate for a poorly balanced door.
Ignoring Safety Tests
Every safety feature should be verified before use.
Garage Door Opener Maintenance Tips
Regular maintenance helps maximize performance and lifespan.
Monthly Tasks
- Test safety features
- Inspect mounting hardware
- Check remote operation
Every Six Months
- Lubricate moving parts
- Inspect chain or belt tension
- Tighten loose fasteners
- Clean photo-eye sensors
Routine maintenance reduces wear and helps prevent unexpected failures.
When to Call a Professional
While many homeowners can install a garage door opener successfully, professional assistance may be beneficial if:
- Electrical modifications are required
- Ceiling support structures are inadequate
- The garage door is improperly balanced
- You encounter wiring difficulties
- Complex smart-home integrations are needed
Professional installation can provide added confidence and ensure compliance with local building requirements.
Conclusion
Installing a garage door opener is a practical DIY project that can greatly improve the convenience, security, and functionality of your home. By carefully assembling the opener, securing the mounting hardware, installing safety sensors, and testing all operational features, homeowners can achieve reliable and safe performance. Taking the time to follow each step correctly and prioritizing safety throughout the process will help ensure that your new garage door opener provides years of dependable service.